

For many home baristas, the morning coffee ritual sets the tone for the entire day. Yet the loud whirring of a traditional grinder can shatter that peaceful moment before dawn. Blade coffee grinders have become a staple in countless kitchens because they’re affordable and compact, making them accessible to anyone starting their coffee journey. However, they come with challenges—uneven grinds and considerable noise can frustrate users seeking consistency and tranquility. This article focuses on how to harness adjustable settings on blade grinders to gain better control over your grind and reduce noise during operation. By mastering these tools, you’ll discover that despite their reputation, blade grinders can deliver customized results tailored to your brewing preferences. Whether you’re brewing French press or espresso-style coffee, understanding how to work with your grinder’s adjustable features transforms your daily coffee experience from chaotic to controlled and enjoyable.
Understanding Blade Coffee Grinders: Basics and Benefits
Blade coffee grinders operate through a simple yet effective mechanism: rapidly spinning metal blades that chop coffee beans into smaller particles. Unlike burr grinders that crush beans between two surfaces, blade grinders use brute force to break down whole beans into grounds. This straightforward design contributes to their primary advantage—affordability. They’re significantly cheaper than their burr counterparts, making them an attractive entry point for home baristas exploring their coffee preferences without substantial investment. Their compact size is another compelling benefit, fitting easily into tight kitchen spaces where larger grinders would be impractical. For apartment dwellers or those with limited counter space, blade grinders offer a practical solution that doesn’t demand dedicated storage areas. However, these advantages come with notable limitations. The spinning blades create uneven grinds because they randomly strike beans rather than producing consistent particle sizes. This inconsistency can lead to unpredictable brewing results where some grounds over-extract while others under-extract. Additionally, blade grinders generate considerable noise during operation, which can be jarring during early morning routines. Despite these challenges, blade grinders remain popular among home baristas seeking simple, accessible solutions for basic grinding needs.
The Importance of Adjustable Grind Settings for Perfect Coffee
Grind size fundamentally shapes your coffee’s flavor profile and extraction quality. When water contacts coffee grounds, the surface area determines how quickly extraction occurs. Coarser grounds present less surface area, allowing water to pass through quickly—ideal for French press brewing where longer steeping times would otherwise over-extract. Conversely, finer grounds increase surface area dramatically, enabling rapid extraction suitable for espresso machines that force water through grounds under pressure. Without adjustable grind settings, you’re locked into whatever consistency your blade grinder produces, forcing you to adapt your brewing method rather than optimizing your equipment for your preferred style.
Adjustable grind settings empower you to customize coffee texture precisely, addressing the fundamental challenge that blade grinders face. By controlling how long blades spin or adjusting mechanical dials, you gain the ability to shift from coarse to fine grinds within seconds. This flexibility transforms your blade grinder from a one-trick device into a versatile tool matching multiple brewing preferences. Whether you’re experimenting with pour-over coffee one morning and French press the next, adjustable settings eliminate the guesswork. The impact on flavor extraction becomes immediately apparent—properly sized grounds extract evenly, producing balanced, nuanced coffee rather than the bitter, over-extracted results that plague inconsistent grinding. This consistency builds confidence in your brewing routine, allowing you to isolate variables and refine your technique systematically. For home baristas committed to improving their coffee quality, mastering adjustable settings transforms your daily cup from acceptable to exceptional.
How to Use Adjustable Settings on Blade Grinders: A Step-by-Step Guide
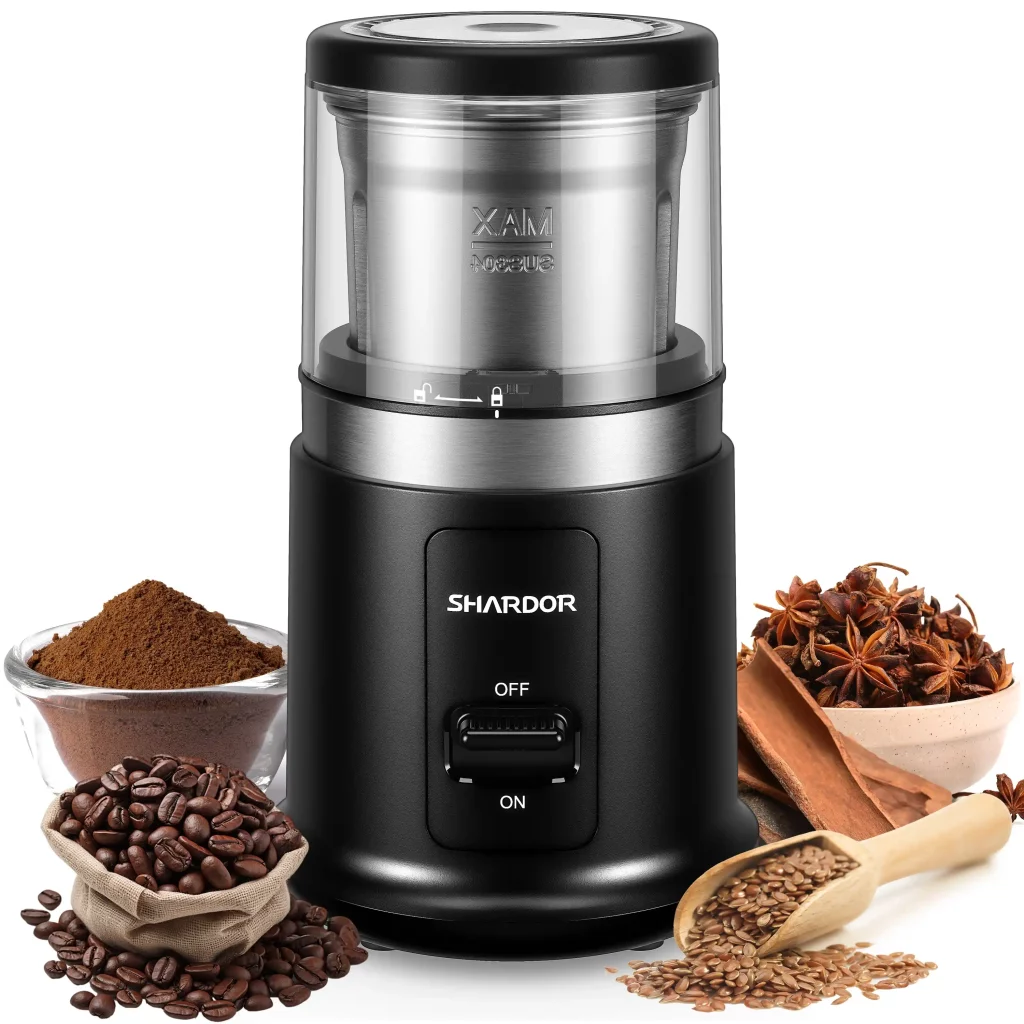
Most blade grinders feature adjustable mechanisms that give you surprising control over your final grind consistency. These mechanisms typically fall into two categories: mechanical dials that physically adjust blade height or grinding chamber design, and timer functions that control how long blades spin. Understanding which type your grinder uses is the foundation for effective customization. Some models combine both approaches, offering dial adjustments paired with precise timing controls. The key is recognizing that even small adjustments create noticeable differences in grind texture. Rather than viewing your blade grinder as a fixed tool, treat it as an instrument with multiple settings waiting to be explored and optimized for your brewing style. Quality grinder models like those from SHARDOR demonstrate how thoughtful engineering in adjustable mechanisms can significantly improve the user experience and grind consistency.
Step 1: Familiarizing Yourself with Your Grinder’s Controls
Begin by thoroughly examining your grinder’s exterior and interior design. Locate any dials, buttons, or adjustment mechanisms—these are your primary tools for customization. Check your instruction manual or manufacturer’s website to understand what each control does, as designs vary significantly between models. If your grinder has a dial, note its range and any labeled settings like “coarse,” “medium,” or “fine.” For timer-based grinders, identify the timing buttons and understand how duration correlates to grind size. Always ensure your grinder is unplugged before inspecting internal components. Look inside the grinding chamber to see the blade configuration and any adjustment mechanisms that might be hidden. Take time to understand the relationship between each control and the resulting grind—this knowledge prevents frustration during actual use. Document your findings by taking photos or notes, creating a personal reference guide for future grinding sessions.
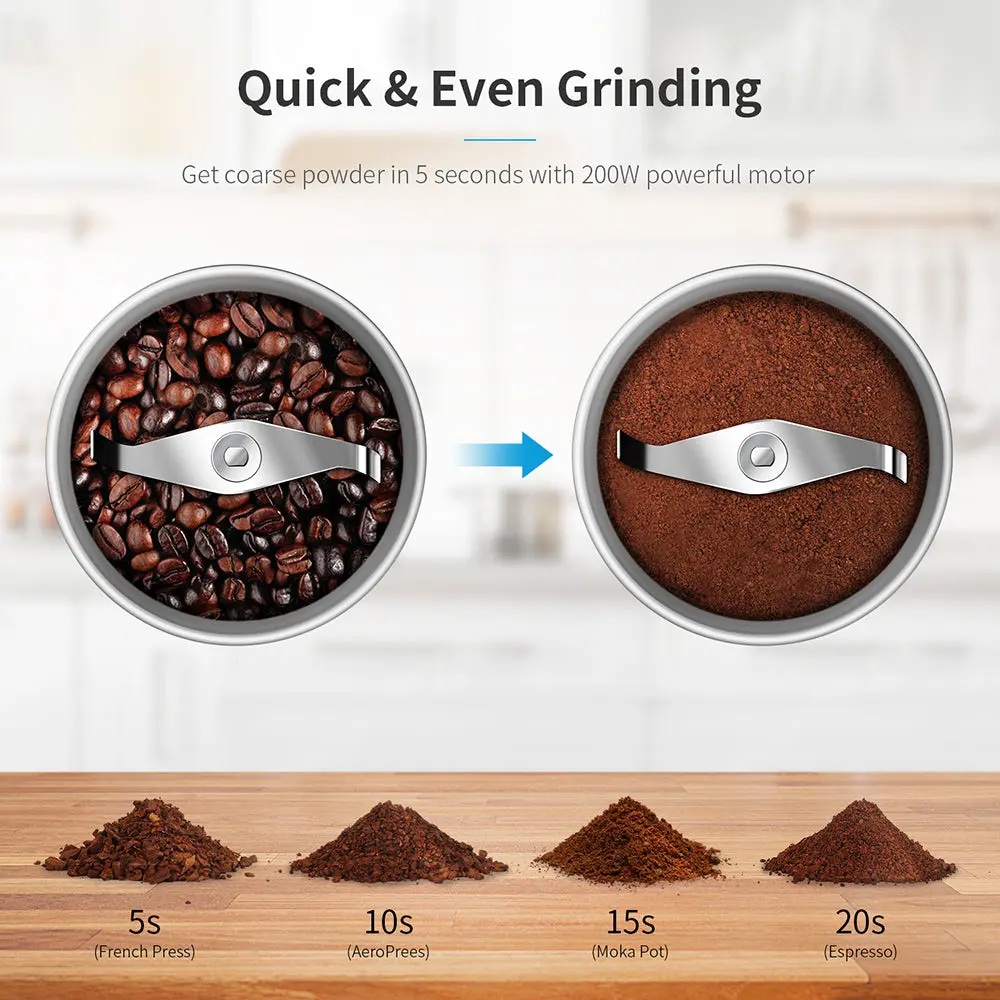
Step 2: Adjusting for Different Brew Methods
Different brewing methods demand specific grind sizes, and your adjustable blade grinder can deliver them with practice. For French press brewing, aim for coarse grounds that resemble breadcrumbs—set your dial to the highest number or use longer pulses of 8-10 seconds. Pour-over methods require medium grounds similar to sand texture; achieve this by setting your dial to mid-range or using 5-7 second pulses. Espresso-style brewing needs fine grounds approaching powder consistency, requiring your dial at lower numbers or short 2-3 second pulses with multiple repetitions. Turkish coffee demands the finest grind possible, necessitating extended grinding or maximum dial settings combined with repeated pulsing. Start conservatively with each new brew method—you can always grind longer, but you cannot reverse over-grinding. Make single-method adjustments and note the settings that produce satisfactory results for your preferred brewing style.
Step 3: Testing and Refining Your Grind
Once you’ve adjusted your settings, test the actual grind consistency before brewing. Pour a small sample into your palm and examine the particle size—it should match your target texture. Feel the grind between your fingers; coarse grounds feel gritty while fine grounds feel almost powdery. Brew a test batch using your adjusted settings and pay attention to extraction time and flavor. If your coffee tastes bitter or over-extracted, your grounds were likely too fine; adjust your settings toward coarser textures. Conversely, weak or under-extracted coffee suggests grounds that are too coarse, requiring finer adjustment. Keep detailed notes documenting which dial settings or pulse durations produced optimal results for each brewing method. This personalized reference becomes invaluable for consistent future grinding. Refine incrementally rather than making dramatic adjustments, as small changes often produce the most significant flavor improvements. Over several brewing sessions, you’ll develop intuitive knowledge of your grinder’s capabilities and find the sweet spot for your preferred coffee style.
Achieving a Quiet Coffee Grinding Experience: Tips and Techniques
The noise generated by blade grinders often disrupts the peaceful morning ritual that many home baristas cherish. However, several practical techniques can significantly reduce grinding noise while maintaining your grind quality. Pulse grinding represents the most effective noise-reduction strategy—instead of running your grinder continuously, use short bursts of 2-3 seconds followed by brief pauses. This approach not only decreases overall noise exposure but also produces more consistent grinds because the beans settle between pulses, allowing more uniform chopping. Place your grinder on a soft surface like a folded towel or rubber mat during operation; this simple step absorbs vibration and dampens sound transmission to your countertop. Additionally, consider grinding in a less noise-sensitive area of your home, such as a kitchen corner away from bedrooms, or schedule grinding after household members have awakened. When selecting a blade grinder, research models specifically marketed as quiet or low-noise options—manufacturers increasingly design grinders with sound dampening materials and optimized blade configurations. Some users find that filling the grinding chamber completely with beans reduces rattling and creates a more muted grinding sound. Experiment with these techniques individually and in combination to discover which approaches work best for your specific grinder model and kitchen environment, transforming your morning coffee preparation into a peaceful experience rather than a jarring interruption.
Maintaining and Maximizing Your Compact Coffee Grinder
Regular maintenance ensures your blade grinder operates efficiently and delivers consistent results for years to come. After each grinding session, unplug your grinder and use a soft brush or dry cloth to remove residual grounds from the grinding chamber and blades. Coffee oils accumulate over time, affecting grind consistency and potentially creating rancid flavors in subsequent batches. For deeper cleaning, some grinder models allow safe removal of the grinding chamber—check your manual before disassembling any components. Run uncooked rice through your grinder occasionally; the rice absorbs oils and cleans internal surfaces naturally without requiring disassembly. Store your grinder in a cool, dry location away from direct sunlight and moisture, which can damage electrical components and promote rust on metal parts. Keep the power cord neatly wrapped to prevent damage, and store any removable parts in a designated container where they won’t be lost or misplaced.
Maximizing your compact grinder’s efficiency involves strategic placement and smart storage solutions. Position your grinder on a stable, level surface near your brewing station to streamline your morning routine and minimize countertop clutter. If space is extremely limited, consider wall-mounted storage solutions or vertical shelving that keeps your grinder accessible without consuming valuable counter real estate. When not in use for extended periods, store your grinder inside a cabinet or drawer to protect it from dust accumulation. Common issues like overheating typically result from grinding too many beans consecutively—allow brief cooling periods between batches to prevent motor strain. If grounds clog inside the chamber, unplug your grinder immediately and gently tap the sides to dislodge stuck material; never attempt to clear clogs with fingers or utensils while plugged in. By implementing these maintenance practices and storage strategies, your compact blade grinder remains a reliable, efficient tool that maximizes your kitchen’s functional space while delivering dependable grinding performance.
Unlocking Your Blade Grinder’s Full Potential
Mastering adjustable settings on your blade grinder transforms it from a basic, one-dimensional tool into a versatile brewing companion capable of delivering customized results for virtually any coffee preparation method. By familiarizing yourself with your grinder’s controls, experimenting with different settings for specific brew methods, and refining your technique through careful testing, you unlock the full potential of this affordable kitchen appliance. The practical strategies for reducing noise—pulse grinding, strategic placement, and selecting quieter models—reclaim the peaceful morning ritual that drew you to coffee appreciation in the first place. Proper maintenance and smart storage solutions ensure your compact grinder remains reliable and efficient, maximizing both performance and kitchen space. Your blade grinder doesn’t need to be a source of frustration or compromise; instead, it becomes an instrument of precision when you understand how to work with its adjustable features. Start experimenting today with small adjustments and careful observation, documenting the settings that produce your favorite results. With practice and patience, you’ll develop an intuitive relationship with your grinder, consistently brewing exceptional coffee that rivals more expensive equipment. The journey toward coffee mastery begins with the tools you already have—embrace your blade grinder’s potential and discover how these accessible machines can elevate your daily ritual from ordinary to extraordinary.