

Every designer knows the frustration. You’ve spent hours perfecting a digital model—every curve calculated, every dimension exact—only to watch that precision crumble the moment you pick up a craft knife. Materials tear instead of separating cleanly. Foam crumbles at the edges. Fabric frays the instant a blade touches it. Composites splinter, demanding tedious sanding and finishing that eats into creative time. Traditional cutting tools, despite their ubiquity, remain stubbornly analog in a digital age, creating a persistent gap between what we design on screen and what we can physically produce.
What if a single tool could close that gap? Ultrasonic cutting technology—once confined to industrial manufacturing—is now accessible to designers, architects, and model makers seeking the same fidelity in their physical work that they achieve digitally. This article explores how ultrasonic cutters can fundamentally transform your design workflow, from initial material preparation through final presentation, delivering precision that matches your vision.
Beyond the Blade: Why Traditional Tools Fall Short for Modern Design
The designer’s toolkit has remained remarkably unchanged for decades. Scalpels and X-Acto knives demand steady hands and fresh blades, yet still produce inconsistent results across long cuts. Rotary tools and jigsaws generate vibration and heat that warp thermoplastics. Band saws leave rough edges on foam core that require hours of sanding. Even the sharpest razor blade drags through Kevlar composites, pulling fibers loose and creating fuzzy margins that undermine the clean geometry you intended.
Fabrics present their own nightmare—woven textiles unravel the moment they’re sheared, forcing designers to apply sealants or heat-treat edges in a separate, time-consuming step. Closed-cell foams compress under blade pressure before springing back unevenly, making dimensional accuracy nearly impossible without multiple passes. And safety remains a constant concern: the sharper the blade needs to be for clean results, the greater the risk to fingers working in tight tolerances on small-scale models.
The irony is that the design process upstream has never been more precise. Laser measuring tools capture room dimensions to sub-millimeter accuracy. Digital rulers in CAD software let you specify curves and angles with mathematical perfection. Precision measurement has become effortless on screen—yet the moment a designer transitions to physical fabrication, that certainty evaporates. The gap isn’t in what we can imagine or specify; it’s in what our hands and traditional blades can faithfully execute. What’s missing is a cutting instrument that delivers the same repeatable, distortion-free accuracy that our digital tools promise—one that treats the material with the same respect our software treats the geometry.
The Ultrasonic Advantage: Precision Meets Versatility
At its core, an ultrasonic cutter operates on a deceptively simple principle: a blade vibrates at frequencies between 20,000 and 40,000 cycles per second—far beyond what the human ear can detect. These micro-vibrations reduce the friction between blade and material to near zero, allowing the tool to glide through substrates rather than force its way through them. The result isn’t just a cut; it’s a controlled molecular separation that preserves material integrity on both sides of the incision. For designers accustomed to fighting their materials, this shift feels almost effortless.
Unmatched Precision and Clean Cuts
The most immediately visible benefit is edge quality. When an ultrasonic blade passes through woven textiles or synthetic fabrics, the high-frequency vibration generates localized heat precisely at the cut line—enough to fuse fibers and seal the edge instantaneously, but not enough to scorch or discolor the material. Fraying simply doesn’t occur. For intricate architectural models requiring clean geometric faces, or textile prototypes where hem allowances must be exact, this means what you measure is genuinely what you get. The tool delivers the physical reality that your efficient measurement tools promised in the digital space. Curves that would require multiple careful passes with a scalpel can be traced in a single fluid motion, maintaining consistent edge quality throughout.
Enhanced Safety and Material Versatility
Because ultrasonic vibration does the cutting work rather than applied pressure, designers can use blades that are relatively dull to the touch—dramatically reducing the risk of accidental lacerations during close-tolerance work on small models. The cutting action generates minimal heat transfer to surrounding material, keeping thermoplastics dimensionally stable and preventing the warping that plagues rotary tool users. This cool-cutting characteristic opens the door to an extraordinary range of substrates: rigid plastics, flexible rubbers, aramid composites, nonwoven felts, closed-cell foams, carbon fiber sheets, and multilayer laminates all yield cleanly to ultrasonic vibration. Materials that once required dedicated specialized tools—or were simply avoided due to fabrication difficulty—become accessible within a single workflow.
Workflow Efficiency and Consistency
Perhaps the most transformative benefit isn’t any single cut but what happens after it. Sealed edges eliminate the sealant application step. Clean faces remove sanding from the schedule. Dimensionally accurate cuts mean parts fit together on the first attempt rather than requiring iterative trimming. For designers producing multiple prototypes or small production runs, the repeatability is equally valuable—the twentieth cut matches the first with identical edge quality and dimensional accuracy, because the process depends on calibrated vibration rather than hand pressure or blade sharpness. This consistency simplifies design processes considerably, compressing what was once a multi-stage fabrication sequence into a streamlined cut-and-assemble operation that keeps creative momentum intact.
Integrating Ultrasonic Cutting into Your Design Workflow: A Step-by-Step Guide
Step 1: Digital Design and Precision Measurement
Every successful ultrasonic cutting operation begins long before the tool powers on. Start with your digital model—whether it’s an architectural section, a product housing, or a textile pattern piece—and ensure every dimension is verified against real-world constraints. Use laser measuring tools to capture existing spatial conditions if you’re designing within a physical context, and cross-reference your CAD geometry with digital rulers to confirm that tolerances are achievable in your chosen material. This precision measurement phase isn’t merely preparatory; it establishes the dimensional truth that your ultrasonic cutter will faithfully reproduce. Export cutting templates at 1:1 scale, noting grain direction for composites and stretch orientation for textiles. The accuracy you invest here transfers directly to the cutting stage with minimal loss.
Step 2: Material Selection and Preparation
With verified dimensions in hand, select your substrate based on both design intent and cutting compatibility. Ultrasonic cutters excel on materials that traditionally resist clean shearing—aramid weaves, multilayer foams, rubberized fabrics, and thin-gauge thermoplastics all respond beautifully to high-frequency vibration. Before cutting, secure your material firmly using appropriate fixturing. For sheet goods, a vacuum table or low-tack adhesive mat prevents lateral movement. For thicker substrates, simple edge clamps or custom jigs maintain registration against your template. Ensure the material lies flat without tension or buckling; even minor distortions translate into dimensional errors when working at the tolerances ultrasonic cutting makes possible.
Step 3: Machine Setup and Tool Selection
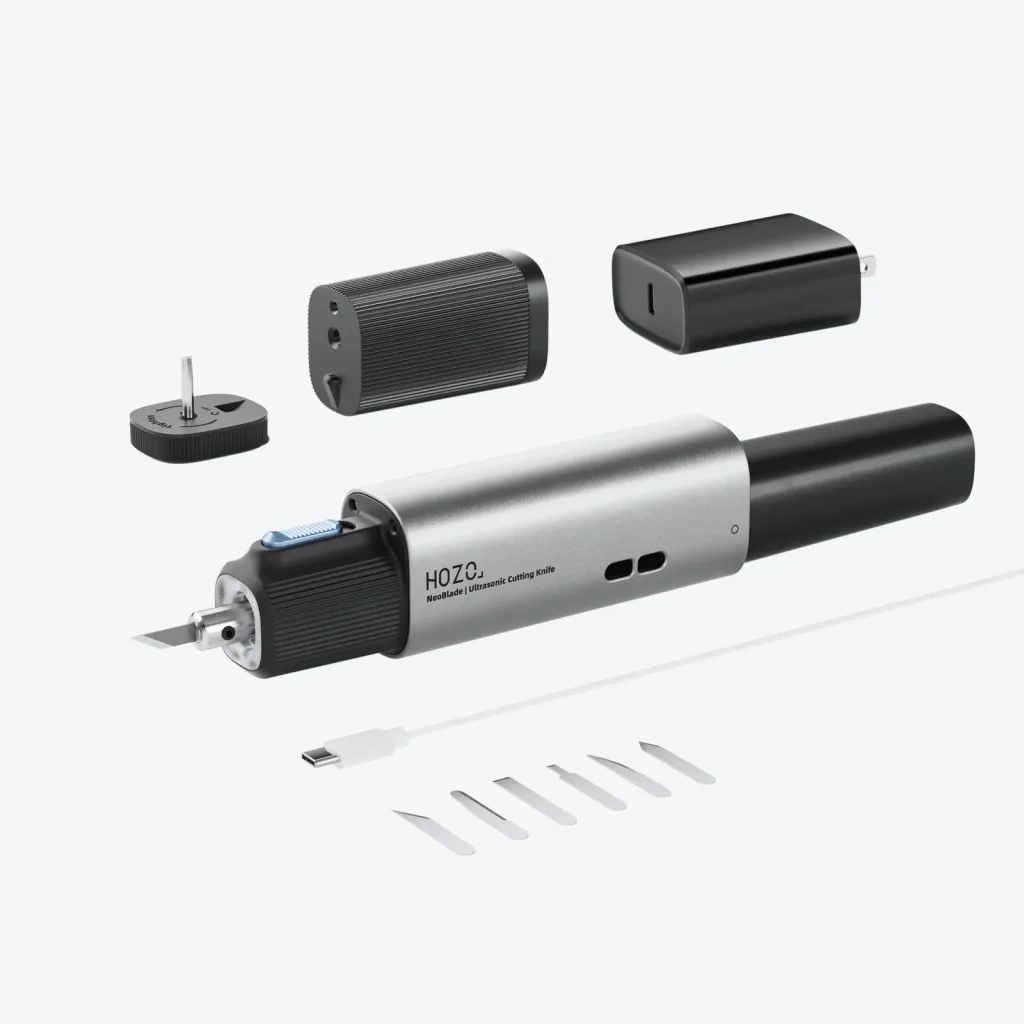
Match your blade geometry to the task. Narrow, pointed sonotrodes handle tight radii and intricate interior cuts on model components, while wider blades suit long straight runs through foam panels or fabric yardage. Manufacturers like HOZO have developed ultrasonic cutting systems with interchangeable blade profiles that allow designers to switch between tasks without recalibrating the entire unit. Set amplitude based on material density—softer substrates like closed-cell foam require lower amplitude to prevent over-penetration, while dense composites benefit from higher energy transfer. Before beginning production cuts, run a brief test on scrap material of identical composition to confirm settings. Complete a quick safety check: verify that the blade guard is positioned correctly, your workpiece is stable, and your hands will remain clear of the cutting path throughout the operation.
Step 4: Executing the Cut and Finishing
For freehand work, guide the cutter along your marked line at a steady, moderate pace—the ultrasonic vibration eliminates the need to push hard, so let the tool set the feed rate naturally. For repeatable geometry, use a straightedge, French curve, or CNC-guided fixture to maintain path consistency. The key technique shift from traditional cutting is this: reduce downward force and increase focus on directional accuracy. Because the blade isn’t fighting the material, your attention can remain entirely on following the intended geometry rather than managing resistance. Once the cut is complete, inspect the edge—in most cases, you’ll find it ready for immediate assembly. Sealed textile edges, smooth foam faces, and burr-free plastic margins eliminate sanding, sealing, and deburring from your task list entirely.
Step 5: From Prototype to Presentation
The cumulative effect of clean, accurate, ready-to-assemble components is a dramatic compression of the prototype-to-presentation timeline. Parts fit together on first attempt because their dimensions match your digital model faithfully. Surface quality is presentation-grade straight off the cutting surface, meaning you can move directly from assembly to client review without an intervening finishing phase. For designers producing iterative prototypes—testing form variations or material combinations—this acceleration is transformative. What previously consumed a full day of cutting, sanding, sealing, and reassembling now collapses into a focused session of cutting and joining, preserving creative energy for design decisions rather than fabrication labor. The workflow transforms from a fragmented sequence of making and correcting into a fluid progression from screen to physical object.
Synergy in the Studio: Ultrasonic Cutters and Digital Tools
No single tool operates in isolation, and the ultrasonic cutter reaches its full potential when positioned as the physical execution layer within a broader digital ecosystem. Consider the workflow holistically: laser measuring tools capture real-world dimensions with sub-millimeter fidelity, feeding accurate spatial data into your design software. Digital rulers within CAD platforms allow you to specify geometry, tolerances, and material thicknesses with mathematical certainty. These digital precision instruments ensure that every template, pattern, and cutting path you generate is dimensionally truthful before fabrication begins.
The ultrasonic cutter completes this chain by translating digital accuracy into physical reality without the degradation that traditional tools introduce. Where a scalpel adds human error and a bandsaw adds material distortion, ultrasonic vibration preserves the dimensional intent encoded in your files. The tool doesn’t replace your laser measuring device or your digital modeling software—it honors their output by executing cuts that match specified geometries faithfully. This creates a closed loop of precision: measure digitally, design digitally, fabricate ultrasonically, then verify the result against your original measurements. Each instrument in the chain speaks the same language of accuracy, eliminating the translation losses that once plagued the transition from screen to studio. The combination of digital precision measurement and advanced physical fabrication establishes a modern design workflow where intent and outcome finally converge—where the model in your hands genuinely reflects the model on your screen.
Bridging Digital Precision and Physical Fabrication
The ultrasonic cutter represents more than an incremental improvement over traditional blades—it fundamentally redefines what designers can achieve at the workbench. Precision that once existed only on screen now transfers faithfully into physical materials, with sealed edges, clean geometric faces, and dimensional accuracy that eliminates the frustrating gap between digital intent and handmade reality. Safety improves dramatically when cutting force is replaced by calibrated vibration, freeing designers to work confidently on intricate, close-tolerance components. Material versatility expands the creative palette, making previously difficult substrates—composites, technical textiles, multilayer foams—as approachable as simple cardstock.
When positioned within a digital workflow alongside laser measuring tools and precision CAD software, the ultrasonic cutter becomes the missing link that completes a closed loop from measurement through design to flawless fabrication. It compresses timelines by eliminating post-processing, preserves creative momentum by removing tedious correction cycles, and elevates presentation quality by delivering assembly-ready components straight from the cutting surface. For designers and architects seeking to execute their visions without compromise, ultrasonic cutting isn’t merely a new tool—it’s a catalyst that transforms the entire practice of making, empowering you to build physical work that genuinely honors the precision of your ideas.
