

Bifold doors can completely transform your space and add loads of natural light. But when it comes to actually installing them, it’s not just a case of slapping up some doors; you’re really dealing with a complex system that needs to be carefully planned out and put together.
As you get ready to install your new bifold doors, you’ll probably be wondering, “How do you install bifold doors?” Well, let’s take a look at each stage of the process. Along the way, we’ll explain some of the key terms and give you some practical tips based on what experts like BMW Ltd. in the trade do.
Step 1: Precise Measuring and the Site Survey
First things first, you need to get the measurements right. This is a crucial stage in installing bifold doors. Take out your tape measure and measure the width of the door frame and wall opening at the top, where the bifold door track is going to be fitted. You need to be spot on here; an incorrect measurement will make the whole installation go wrong. Leave a little gap on either side for the tracking system to fit snugly into. To make sure the opening is square, measure the diagonals between the opposite corners and make sure they’re the same measurement. You should also measure the width and height at three different points.
Installing bifold doors into a space that needs an opening made in it is a task best left to a professional – it’s just not worth the risk of damaging the walls or having to spend a small fortune fixing any problems that arise. They’ll need to bring in a rolled steel joist to redistribute the weight above the opening – not a job for the faint of heart.
If you’re thinking of installing internal bifold doors, it’s a good idea to lay down new carpet first. You’ll need to leave a bit of clearance between the bottom of the door and the carpet, about 19mm to 12mm should do it. This will give you a nice smooth action when you swing the doors open and closed.
Step 2: Preparing the Aperture—Ready for the New Frame
After a thorough site survey and measuring session (don’t forget to double-check and account for packing out any small gaps with plastic packers), it’s time to prepare the opening. If you’re replacing old doors or windows, remove frames and trims carefully. Clean up all debris; the new outer frame will need a clean, solid base and sides to get a perfect fit.
Your bifold doors will usually arrive slightly smaller than the opening to accommodate the frame and installation hardware, typically by around 10-15mm. This room is important for ensuring the frame can be made perfectly plumb, level, and square using packers and fixings to create a flawless installation.
Step 3: Assembling and Fitting the Outer Frame
Now it’s time to put the frame together according to the manufacturer’s instructions. Bifold door frames usually come in sections for easy transport and handling, so you can just join them together to create a perfectly square shape, checking the alignment as you go, of course. Getting someone to give you a hand with this bit is a good idea because of the weight of the frame. Lift it into position and use a long spirit level or laser level to check that it’s perfectly plumb, level, and square – if you get this wrong, you’ll be in for a world of trouble. Add some plastic packers between the frame and the wall to fill any gaps and make sure it’s stable, then secure the frame to the brickwork or internal wall with some suitable screws and fixings. Don’t forget to drill any holes where marked and take care not to overtighten and distort the frame.
If you’re fitting internal bifold doors, the top track will usually be set about 19mm (3/4 inch) back from the front edge of the header. For external doors, you’ll need to fit weather gaskets and seals to give you that all-important weather resistance.
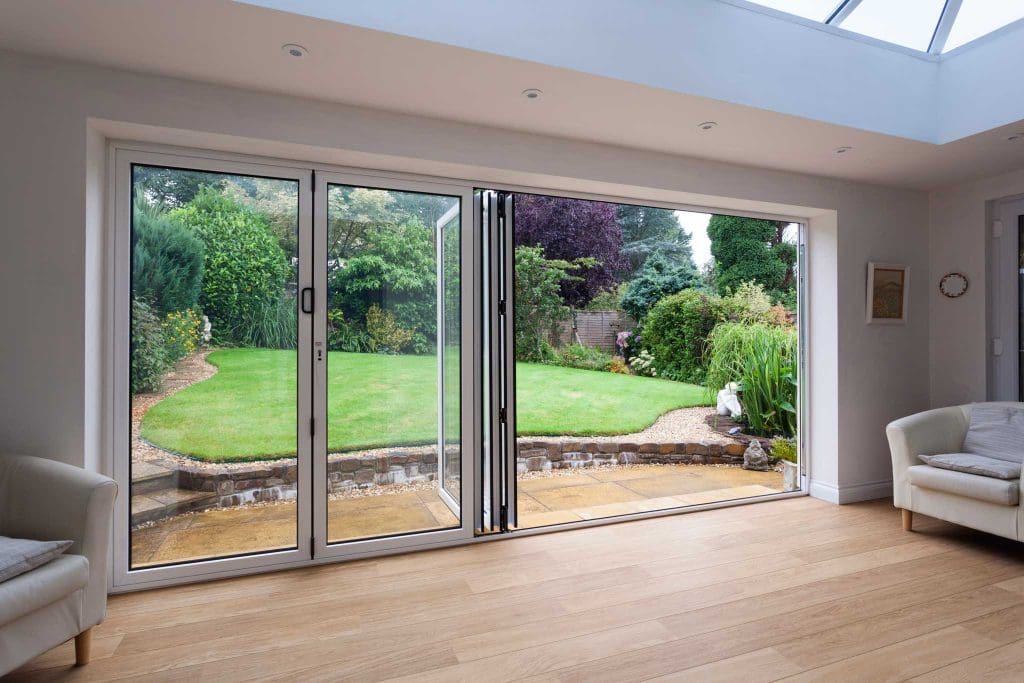
Step 4: Hanging the Door Panels and Glazing
Now it’s time to hang the bifold door panels, also known as the leaves. Attach the hinges to each panel and secure the rollers in the top and bottom tracks. Aluminium bifold doors and uPVC bi-folds are pretty heavy, so get someone to give you a hand with lifting the panels into position. Make sure the rollers fit precisely into their tracks, so the doors slide and fold smoothly in use.
This is also the stage where you’ll usually glaze your doors. Use the included glazing beads or clips to fit the glass units, making sure they’re securely sealed and in place. Double-glazed and triple-glazed options give you that extra bit of energy efficiency and noise reduction.
Step 5: Adjusting for Effortless Operation
Getting proper alignment with your bifold doors makes it easy to get that effortless “bi-folding” motion going and avoids one of the most common problems people have, doors catching on floors or carpeting. When installing the panels, you want to “heel and toe” them carefully so that you are distributing the weight evenly. This is an essential part of ensuring everything folds evenly. Of course, the hinges and tracks need to be adjusted with the door both open and closed, and this process of fine-tuning will perfect the reveal and make the operation silky smooth. Once you’ve got the multi-point locking system sorted, you need to check that the locking points are properly aligned and give the handles a test to make sure they’re secure and fit properly.
Step 6: Sealing and the Finishing Touches
Once your bifold doors are up and running smoothly, it’s time to fill in any gaps around the outer frame, both inside and out, with high-quality sealants. You should use expanding foam for added support and insulation, and then run a bead of good-quality silicone sealant to prevent drafts and stop any water from getting in. Don’t forget to refit any internal trims, jambs and decorative mouldings and give all the glass and finishes a good wipe with a damp cloth to keep them looking their best.
When it comes to exterior bifold doors, make sure all the weather seals and trickle vents are in place, and that the doors open smoothly from the inside and the outside. Double-check the final “fit” when the door is closed and fully folded.
FAQs and Key Considerations
- How long does it take to install bifold doors? Typically, an experienced installer can get a three-door set installed in a day.
- Do I need planning permission? In most cases, putting in or replacing bifold doors is classed as “permitted development”, but if you live in a listed building or a home in a conservation area, you should check with your local council before you start.
- What tools do I need? Common tools you’ll need include a tape measure, a drill, screwdrivers, assorted screws, wall plugs, packers, a spirit level and protective gear.
- Can bifold doors be custom-built? Yes, absolutely! Aluminium bifold doors can be made in over 150 different colours, with bespoke sizes for tricky openings (like corners or bays) and custom-made to match your home’s interior design. Aluminium is incredibly durable, resistant to weather and corrosion and can be powder-coated for a low-maintenance, luxurious finish.
Why Professional Bifold Door Installation Matters
Bifold and folding door installation is a job for an expert. Accurate measurement, structural support, weather resistance, and security features depend on the right installer. Getting it wrong can cause all sorts of trouble: doors that won’t close, draughts, leaks, lock issues, or even structural headaches. Consult local trade professionals with experience in installing bi-fold doors, and have a survey performed before any major changes.
Professional installation ensures a perfect fit, energy efficiency, and years of flawless operation for your new doors. With every panel moving smoothly and every lock secure, you enjoy complete peace of mind.