
We’ve all been there — you snap what feels like the perfect photo, only to zoom in later and discover it’s blurry, pixelated, or just not sharp enough to use. Maybe it’s a group shot from a family gathering that someone wants to print and frame. Maybe it’s a product photo for your online store that looks fine on a phone screen but falls apart on a desktop monitor. Low-resolution images are frustrating, and for years, fixing them meant either expensive software with a steep learning curve or hiring a professional.
That has changed. AI-powered image enhancement has made it possible to take any photo and upscale it to crisp HD 1080p or even 4K quality — right in your browser, with no software to install and no editing skills required. A HD Photo Converter powered by artificial intelligence can analyze your image, fill in missing detail, sharpen edges, and boost resolution in seconds. This guide will walk you through everything you need to know: why it matters, how to do it step by step, and what you can create once your images are looking their absolute best.
Why Use an HD Photo Converter?
There are plenty of reasons someone might need to upscale an image, and they’re more common than you might think.
First, there’s the practical reality of modern photography. Smartphone cameras are better than ever, but they still struggle in low light, at long distances, or when you need to crop into a specific part of a photo. Every time you zoom or crop, you lose pixels — and with them, clarity. An HD photo converter reverses that loss by using AI models trained on millions of high-resolution images to intelligently reconstruct the detail that cropping removes.
Speed is another major factor. Traditional photo editing workflows could take hours: import the file, adjust settings manually, render, export, check the result, and repeat if something looks off. An online HD photo converter does the heavy lifting automatically. You upload an image, the AI processes it, and within seconds you have a high-resolution version ready to download. No manual tweaking, no trial and error.
Then there’s cost. Professional upscaling tools used to run into the hundreds of dollars for a perpetual license, not to mention the hardware required to run them smoothly. Today, the best HD photo converters are entirely browser-based and free to use — no credit card, no sign-up, no watermark on your exported images.
How to Convert Photos to HD Quality: A Step-by-Step Guide
The process is surprisingly simple. Here’s how to go from a low-res original to a crisp, high-definition version in under a minute.
Step 1: Choose the Right Starting Image
The quality of your output depends partly on the quality of your input. A photo that’s slightly soft or mildly pixelated will upscale beautifully. A photo that’s extremely compressed — think an old thumbnail saved and re-saved from social media — will improve, but the AI has less data to work with. For best results, start with the highest-resolution version of your image you have access to. Common formats like JPG, PNG, and WebP all work fine.
Step 2: Upload Your Photo to the Converter
Open your browser and head to an HD photo converter. Drag and drop your image into the upload area, or click to browse your files. There’s nothing to install, nothing to configure, and no account to create. The tool accepts most standard image formats and sizes, so you can get started immediately.
Step 3: Select Your Output Quality
Once your image is uploaded, you’ll see options for your target resolution. Most tools offer 1080p HD as the default, with 4K available for images that need the highest possible level of detail. If you’re enhancing a photo for social media, 1080p is usually sufficient — platforms like Instagram and X compress uploads anyway. If you’re preparing images for print, a website banner, or professional presentation, 4K gives you the headroom to crop and resize without losing quality later.
Step 4: Let the AI Process and Enhance
Click the enhance or convert button and let the AI do its work. The tool analyzes your image — identifying edges, textures, faces, and patterns — and reconstructs the missing detail using deep learning models. This typically takes between 5 and 30 seconds depending on your image size and the target resolution. A progress bar or spinner will show you that processing is underway.
Step 5: Preview, Download, and Use
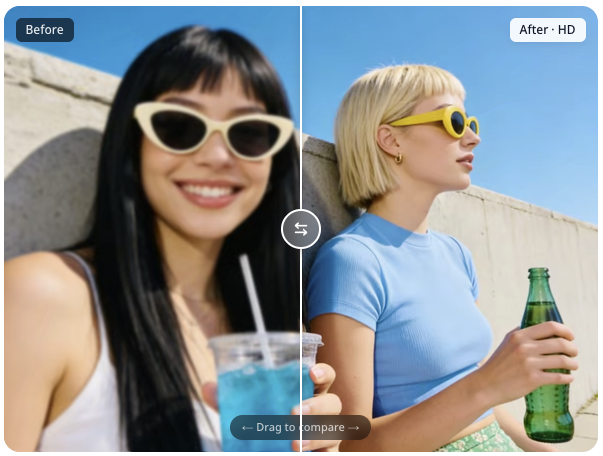
When processing completes, you’ll see a side-by-side comparison of your original and the enhanced version. Zoom in and check the details — you’ll notice sharper edges, reduced noise, and more defined textures. If you’re happy with the result, download the HD version. Your enhanced image is saved without a watermark and is ready to use wherever you need it — social media, blog posts, marketing materials, or personal projects.
Creative Ways to Use Your HD Photos
Once you’ve upscaled your images, a whole range of possibilities opens up.
Social Media Content. Platforms reward high-quality visuals. A crisp, well-lit image stops the scroll in a way that a grainy photo never will. Run your product shots, travel photos, and portraits through an HD photo converter before posting and you’ll notice the difference in engagement.
E-Commerce Product Photography. Online shoppers can’t touch or examine your products — the photo is the product. High-resolution images build trust and reduce return rates. If your supplier photos are low-res, an HD upscaler can bring them up to the standard online marketplaces expect.
Old Photo Restoration. Many of us have boxes of old family photos — printed, scanned years ago at low resolution, or saved from old phones. An HD photo converter breathes new life into those images, sharpening faces, restoring faded colors, and making them suitable for reprinting or sharing with family.
Print and Framing. A photo that looks fine on a 6-inch phone screen might not hold up when blown up to an 8-by-10 print. Upscaling to 4K ensures your prints come out sharp, whether you’re framing a family portrait, a landscape from your last trip, or artwork for your walls.
Tips and Best Practices for Better Results
- Start with the best original you have. The AI can fill gaps, but it can’t invent detail that was never there. A 720p photo upscales far better than a 240p thumbnail.
- Match resolution to your end use. 1080p is perfect for screens and social media; 4K is ideal for print, large displays, or when you plan to crop further.
- Avoid re-compressing after upscaling. Download in PNG or high-quality JPG. Re-saving at low quality undoes the enhancement work.
- Process one image at a time for best results. Batch processing is convenient, but individual attention to each photo’s resolution settings yields the best outcome.
- Check your results at full size before sharing. Zoom into 100% view and scan for any unexpected artifacts. Modern AI tools rarely produce them, but a quick check is always worth it.
Frequently Asked Questions
Is an HD photo converter really free?
Yes. Many of the best HD photo converters online are completely free to use with no watermark on exported images. Some offer paid plans with higher monthly enhancement credits for heavy users, but the free tier covers everyday photo improvement needs.
Do I need any design or technical skills?
Not at all. The entire process is uploading a photo, clicking a button, and downloading the result. If you can attach a photo to an email, you can use an HD photo converter.
How long does it take to enhance a photo?
Most images process in under 30 seconds. Larger files or 4K target outputs may take a bit longer, but rarely more than a minute.
Can I use the enhanced images for commercial purposes?
Yes. Your images remain yours. You can use them for social media, e-commerce listings, marketing materials, blog posts, and print products without restriction.
What image formats are supported?
Most converters support JPG, PNG, and WebP. Some also handle TIFF, BMP, and HEIC files. The most common formats are universally supported.
Start Enhancing Your Photos Today
AI-powered HD photo conversion has leveled the playing field. What once required expensive software, powerful hardware, and years of editing experience is now available to anyone with a browser and an internet connection. Whether you’re a small business owner making product photos look professional, a content creator chasing better engagement, or someone who just wants to print and frame a cherished memory without it turning into a pixelated mess — the tools are ready.
The only thing left to do is upload your first photo and see the difference for yourself.