

Though the Wavlink AC1200 setup is a process that you can do conveniently to expand your existing network’s signals. However, doing it for the first time ever can be a bit tricky or you might face some setup errors. No doubt, that condition can be frustrating for you if you are unable to find relevant guidance for the setup.
But, there is no need to stick to those issues as we are here with some useful and valuable troubleshooting tips. Using or implementing these solutions will help you to execute the setup process without experiencing any obstructions. In this post, we will discuss some best practices to resolve Wavlink AC1200 setup errors.
Possible Causes Behind The Errors
There can be a number of likely reasons that can make the setup process next to impossible for you. The problem can be in the Wavlink AC1200, the existing router, or your device. Maybe the extender is not connected to the router and device. Another possibility is that you are using the imperfect details of Wavlink while doing the process. Lastly, a temporary glitch keeps occurring in the Wavlink web setup portal. Thus, these are the points users face usually for the first time.
Solutions For Setup Errors
Verify those above-mentioned causes and try recognizing the source of the errors. Following that, take these solutions and apply them perfectly for a successful and hassle-free setup approach.
Check Devices’ Compatibility
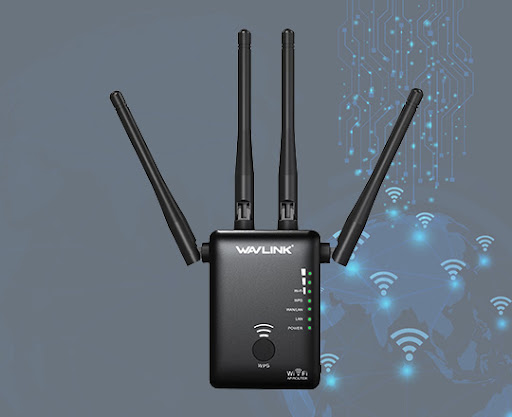
Although the Wavlink AC1200 extender supports a WPS function, you can use it to set it up with your router. But, the condition here is that your router must be capable of working on WPS. More than that, check the Wavlink extender’s compatibility before purchasing it, whether that is able to attach to the router or not.
For more information, check the extender’s manual guide to know its specifications so that you can make use of the extender at its best performance. Also, check your existing router’s technical features if it supports the 2.4GHz and 5GHz frequency bands, as the Wavlink extender can extend both bands.
Verify The Connection Strength
Prior to initiating the Wavlink AC1200 Setup, it is crucial to analyze the connection between the extender, router, and device. But, before anything else, make sure the extender is tightly plugged into a power socket with an uninterrupted power supply. Later, check the connectivity of the device whether it is connected through a wire or wirelessly. Ensure to choose the extender’s default network from the wireless network list and fill in the default password. Alternatively, the ethernet wire must not have a sign of tear or wear, if there is any then replace the wire immediately.
Choose Best Placement
While doing the Wavlink AC1200 setup process, it is mandatory to place the extender and router closer. As the far distance between both can cause you to face setup errors. So, place the extender, router, and device in the same place while configuring the extender. In addition, keep both devices away from your house’s electrical appliances and other metallic things to avoid signal interruptions.
Use Details Accurately
In the web-based and app setup processes, you will be required to access the setup portal using the extender’s web or IP address. However, the WPS process does not require these specific things. But, to manage the extended network, you will need to choose other setup processes. So, keep those pre-requirements ready with you before starting the setup process.
During the process, keep in mind to search for the extender’s default web or IP address. Insert these details without any spacing and numeric mistakes. Further, use the extender’s login details such as the username and password appropriately. The username and password of the extender will be “admin” that you can take out from its manual setup guide if that is not working.
Disable Firewalls And Clear Cookies
If the setup portal is not accessible to you even after trying those points, then take this step into account. Check the web browser of the device that you are using currently. Try to clear the browser’s cookies, caches, and history to avoid malfunctioning. Afterward, turn off the firewalls of the antivirus in your device and of your router for a short period of time. As firewalls can block some ports and websites and obstruct communication between the extender and the device. Now, try accessing the Wavlink AC1200 setup portal on your device.
Power-Cycle The Extender
In this process, unplug the extender from the power socket and keep this unplugged for a few minutes. As the extender can have a technical glitch in it. Further, plug the extender into another power outlet and check the power LED on its panel. If the extender becomes ready for the configuration process, then start the procedure on any web browser.
Reset The Wavlink AC1200
Here another foolproof solution to get things clear is resetting the extender. It will help you to resolve the extender’s technical error if there is any. So, push the reset button from its back panel and hold it till the LED starts flashing. Wait for some time till the process completes and the LED becomes stable. Meanwhile, check the existing router and device’s working before moving to the setup process. Once the process is complete, do the Wavlink AC1200 setup finally.
Set Up The Extender
After resetting the extender, start the setup process on your networked device. Open the web browser on it and insert the extender’s default web/IP address in the search field and click enter. As a result, the login window will be visible on the screen prompting you to enter the username and password. After inserting these, configure the extender according to your preferences by using the on-screen directions.
Some Consideration Points After Setup
For uninterrupted and smooth network performance, here are some useful points that you must take into account. After setting up the extender, you can relocate it to another place but it should be within the router’s range. There must be an active and updated internet plan in the router. Try making wired connections rather than wireless to get stable internet signals.
To make the network unique and secure, change the SSID network name and password often. Also, keep changing the extender’s bandwidth channels and keep the frequency bands activated every time. Lastly, change the extender’s IP address if two or more devices are running on the same one. Here we advise you to monitor the extended network frequently and you will keep getting flawless performance of the extender for sure.