
If you’ve ever tried to wrangle a water-logged spa cover alone, you know how quickly a relaxing soak can turn into a back-straining chore. A spa cover and lifter combo is the simplest upgrade to make your routine safer, faster, and more energy efficient. This guide breaks down everything—cover materials, lifter types, clearance requirements, installation tips, costs, and a care routine you can actually keep. By the end, you’ll know exactly how to measure, shop, and install with confidence.
Why You Need a Good Cover (Even Before the Lifter)
A quality cover is the first line of defense for energy savings and water quality. It traps heat, reduces evaporation, blocks debris, and helps prevent accidental access. The right cover:
- Reduces heat loss and cuts monthly operating costs.
- Extends component life by stabilizing temperature and limiting contaminants.
- Improves safety with locking straps and tight seals.
- Prevents UV wear on acrylic and headrests by limiting exposure.
Key materials/features to look for:
- Foam density (e.g., 1.5–2.0 lb/ft³): Higher density = better insulation and crush resistance.
- Tapered core (e.g., 5–3″ or 6–4″): Sheds rain and snow; thicker at the center for strength.
- Heat-sealed vapor barrier: Slows water absorption, which causes covers to get heavy and inefficient.
- Marine-grade vinyl with UV/mildew inhibitors and reinforced stitching at handles/hinge.
- Full-length hinge seal to prevent steam leakage at the fold.
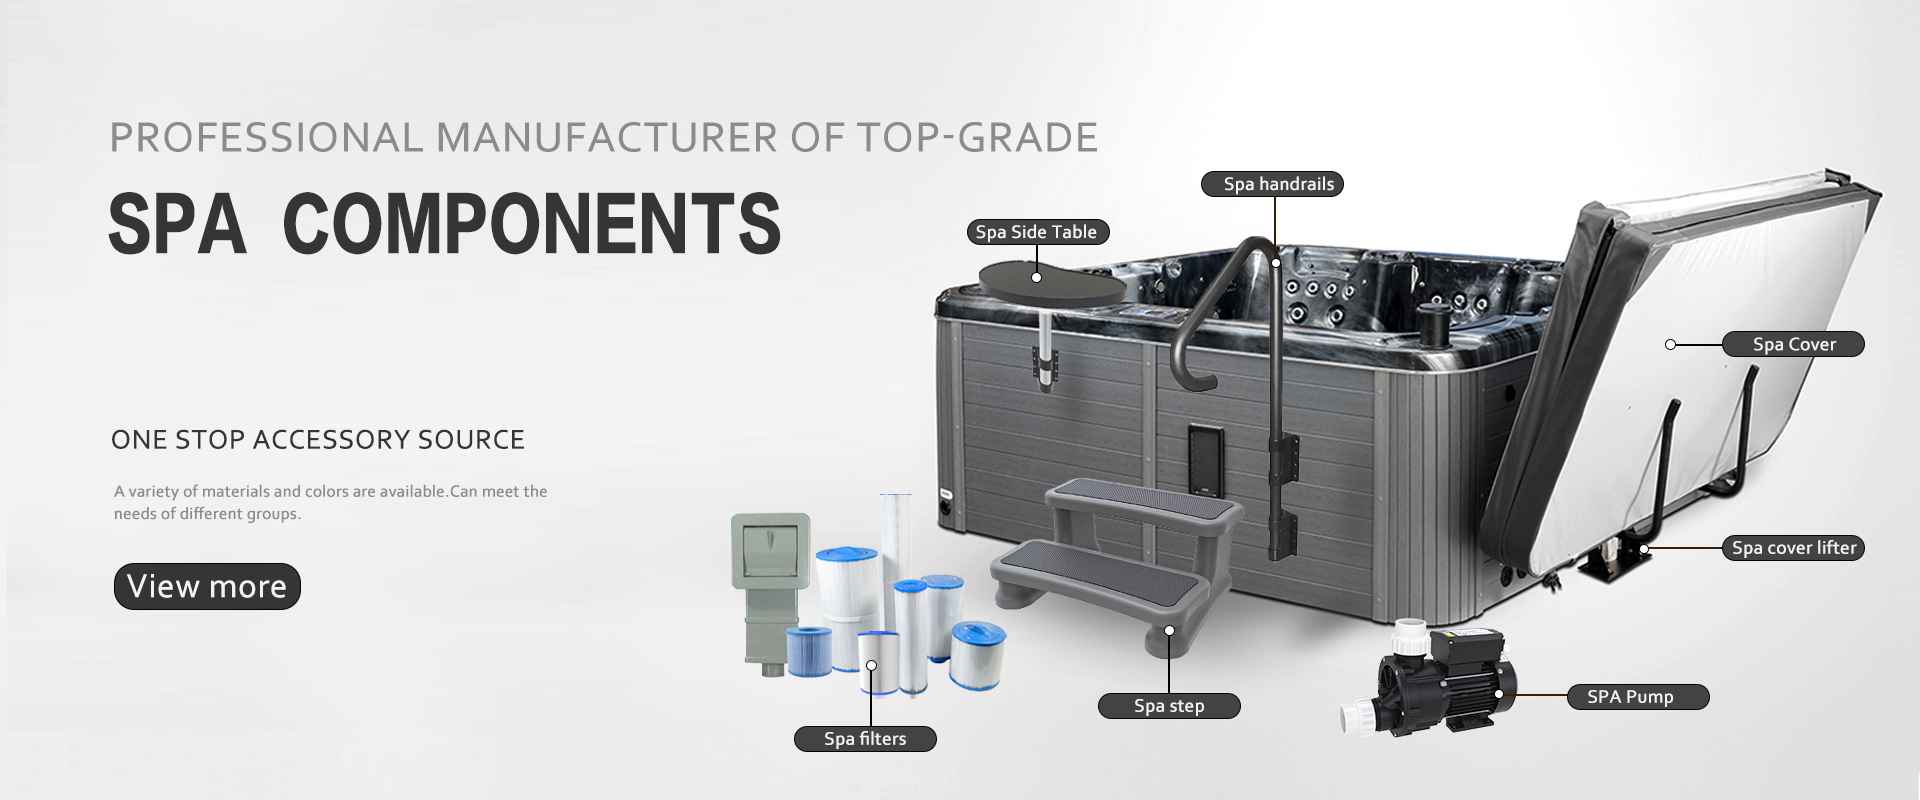
Why a Lifter Is Worth It (Even if You’re Strong)
A spa cover lifter turns a two-person job into a one-hand task. Dragging a cover shortens its life—corners tear, vinyl scuffs, and the foam core flexes. A lifter:
- Prevents damage by supporting the cover evenly.
- Saves your back with leverage or gas-assist.
- Speeds up use—you’ll soak more often when access is easy.
- Keeps the cover off the ground, avoiding dirt and puddles that stain or grow mildew.
Types of Spa Cover Lifters (Pros, Cons, and Best Use)
- Manual pivot lifters
- Pros: Affordable, simple parts, easy DIY.
- Cons: Requires some effort; check rear/side clearance (often 12–18″).
- Best for: Most square spas with available space behind.
- Hydraulic-assist lifters
- Pros: Gas shocks reduce lifting force; smooth motion; great for heavier covers.
- Cons: Higher cost; eventual shock replacement.
- Best for: Large spas, thicker insulated covers, users who want minimal effort.
- Under-mount lifters
- Pros: No drilling into the spa cabinet—base plate slides under spa.
- Cons: Slightly more complex to position; requires stable ground.
- Best for: Composite cabinets, renters, or when you prefer not to drill.
- Deck-mount lifters
- Pros: Rock-solid feel when installed into surrounding deck framing.
- Cons: Requires good anchoring; plan before you build the deck.
- Best for: Built-in or recessed spas with deck surrounds.
- Shelf/slide-away styles
- Pros: Cover slides onto a side “shelf”; often minimal moving parts.
- Cons: Needs more lateral space; aesthetics vary.
- Best for: Spacious yards where side clearance isn’t an issue.
Clearance tip: Measure twice. Many lifters need 6–18 inches behind and 3–6 inches on the sides. Round spas or tight corner radii may require specialty models.
Sizing Your Cover: Step-by-Step
- Measure lip-to-lip length and width (not the cabinet).
- Corner radius: Use a radius template or measure chord/offset—critical for a tight fit.
- Skirt length: Commonly 4–5″; matches the shell lip depth.
- Hinge direction: Decide which side will fold based on your yard layout and prevailing wind.
- Strap placement: Match cabinet clips—note number and positions.
Climate fit:
- Cold climates: Choose higher foam density and thicker taper (e.g., 6–4″).
- Windy zones: Prioritize robust hinge reinforcement and extra straps.
- Sun-intense regions: Ask for UV-resistant vinyl grades and regular conditioning.
Installation: A Practical, Real-World Walkthrough
Tools: Drill/driver (if cabinet-mount), tape measure, level, socket set, pencil, protective pads.
Process:
- Dry-fit the arms with the cover in place to confirm swing and clearances.
- Square and level brackets—use a level across the hinge for alignment.
- Fasten brackets per torque spec (avoid overtightening in composite cabinets).
- Attach arms and pivots, then cycle the cover open/closed 3–5 times.
- Adjust gas shock orientation (rod-down if specified) and tension if applicable.
- Secure straps/locks, set equal tension, and recheck after the first week.
Pro move: Fill and heat the spa before final adjustments. Warm vinyl flex differs from cold, so set clearances under “normal” conditions.
Maintenance: A 15-Minute Monthly Routine
- Rinse and wipe the top and underside to remove chemicals and biofilm.
- UV-safe vinyl conditioner quarterly (avoid petroleum solvents).
- Hardware check twice a year—tighten fasteners; inspect shock seals and pivots.
- Hinge health: Look for small tears early; reinforce or replace before failure.
- Waterlogging test: If the cover feels unusually heavy, the vapor barrier may be compromised—plan a replacement.
Costs and What to Expect
- Cover: ~$350–$800+ depending on size, density, and vinyl grade.
- Lifter: ~$120–$400+ (hydraulic models at the higher end).
- DIY time: 45–90 minutes for most installs.
Common Mistakes to Avoid
- Buying the lifter first and discovering clearance conflicts later.
- Measuring the cabinet instead of the shell lip.
- Skimping on foam density in cold climates.
- Using household cleaners that dry out vinyl and void warranties.
- Storing the cover on rough surfaces that abrade the underside.
Quick FAQ
How long should a cover last?
Typically 3–5 years; coastal sun or heavy ozone use may shorten that.
Can I install a lifter alone?
Yes—most include templates. Having a helper makes alignment faster.
Will a lifter fit a round spa?
Yes—choose a model designed for round/oval shells and confirm radius specs.
Bottom line: Size the spa cover correctly for your climate and model, then choose a lifter that fits your space and effort level. You’ll soak more, strain less, and spend less on heat over the long run.