

Moving to a new home is always exciting, but packing the kitchen can be one of the most challenging tasks. From fragile glassware and bulky appliances to countless small utensils, this room requires strategy, patience, and the right materials. If you’re preparing for a move and need expert help, many homeowners rely on trusted movers in Los Feliz who know how to handle delicate kitchen items safely and efficiently. But even if you decide to do the packing yourself, this step-by-step guide will help you protect your belongings and save time.
Why the Kitchen Is the Hardest Room to Pack
Unlike other rooms in the house, the kitchen contains items of all shapes, sizes, and fragility levels. Think about it: pots and pans, wine glasses, fine china, appliances, food items, and cleaning supplies. The sheer variety makes the process overwhelming.
- Fragility: Dishes, stemware, and ceramics are highly breakable.
- Bulkiness: Large appliances and cookware require special attention.
- Quantity: Hundreds of small items—measuring spoons, spice jars, and utensils—need sorting.
- Perishables: Food must be handled differently than non-perishables.
Because of these factors, many movers consider the kitchen the most time-consuming room to pack.
Step 1: Gather the Right Packing Supplies
Before you pack, make sure you have the correct materials on hand. Quality supplies reduce the risk of breakage and speed up the process.
- Sturdy moving boxes in small, medium, and large sizes
- Dish pack boxes with cell dividers for glasses and stemware
- Bubble wrap and packing paper
- Packing tape (extra rolls—you’ll use more than you think)
- Permanent markers for labeling
- Ziploc bags for small parts and screws
- Stretch wrap for sealing drawers or wrapping utensils
- Towels and linens as eco-friendly padding alternatives
Pro tip: Always use small boxes for heavy items (like dishes and canned food) to avoid overpacking.
Step 2: Declutter Before Packing
The kitchen often hides items you don’t really use. Moving is the perfect opportunity to downsize.
- Expired food: Check expiration dates and toss old items.
- Duplicate utensils: Do you really need six spatulas?
- Broken or chipped items: Save space and discard.
- Rarely used gadgets: Donate that bread maker if it hasn’t been touched in years.
Decluttering ensures you only pack what you truly need in your new home.
Step 3: Pack Kitchen Items by Category
Breaking the kitchen down into categories makes the process manageable.
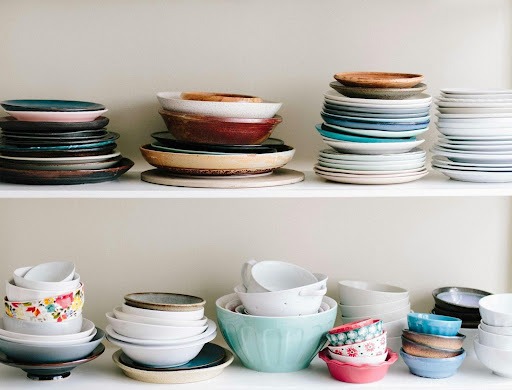
3.1. Plates, Bowls, and Dishes
- Wrap each item individually in packing paper.
- Stack them vertically in boxes (like records), not flat, to minimize breakage.
- Place heavier dishes at the bottom, lighter ones on top.
3.2. Glassware and Stemware
- Use dish pack boxes with cell dividers.
- Wrap each glass in paper or bubble wrap.
- Fill empty spaces with crumpled paper to prevent shifting.
3.3. Pots and Pans
- Stack by size, placing paper or bubble wrap between each.
- Store lids separately in padded sleeves.
- Use medium boxes so weight remains manageable.
3.4. Utensils and Cutlery
- Group by type (knives, spoons, forks).
- Wrap knives in cardboard sleeves or towels for safety.
- Rubber band bundles together and place them in Ziploc bags.
3.5. Small Appliances
- Original boxes are best. If unavailable, wrap appliances in bubble wrap.
- Remove blades, trays, or cords and pack them separately in labeled bags.
- Cushion with towels or linens.
3.6. Pantry Items
- Seal open packages with tape or place them in plastic bags.
- Avoid packing liquids that could spill.
- Consider donating non-perishables you don’t want to move.
3.7. Large Appliances
- Defrost refrigerators at least 24 hours before moving.
- Drain dishwashers, washing machines, and coffee makers.
- Secure cords and doors with tape or stretch wrap.
Step 4: Label Every Box Clearly

Labeling is critical for both unpacking and ensuring movers handle fragile items with care.
Include:
- Contents (“Wine Glasses – Fragile”)
- Destination Room (“Kitchen”)
- Handling Instructions (“This Side Up” / “Heavy”)
Color-coding with stickers makes it even faster to organize on moving day.
Step 5: Keep an Essentials Box
Don’t pack away everything—you’ll need certain items the first night in your new home.
Your essentials box should include:
- A few plates, bowls, and utensils
- Coffee maker or kettle
- Dish soap and sponge
- Paper towels
- Snacks and non-perishable food
- One or two pans for cooking
This box should travel with you, not on the moving truck.
Step 6: Timing Your Packing
Packing the kitchen last is a common mistake. Start early, but follow a schedule:
- Two weeks before move: Pack rarely used gadgets, special dishes, and extra serving platters.
- One week before move: Pack most pantry items and small appliances.
- Two days before move: Pack daily dishes and utensils, leaving just enough for your family.
- Moving day: Pack the essentials box and any refrigerated items in a cooler.
Common Mistakes to Avoid
- Overpacking boxes: Heavy boxes are prone to breaking.
- Using newspaper: Ink can transfer to dishes—use plain packing paper.
- Not padding enough: Empty space in boxes leads to shifting and damage.
- Forgetting about liquids: Oil bottles, sauces, and cleaning supplies must be sealed properly.
- Packing everything: Don’t move expired or unnecessary items.
Eco-Friendly Packing Tips
Sustainable moving is growing in popularity.
- Reuse old boxes from friends or local stores.
- Use kitchen towels, oven mitts, and linens as padding.
- Donate food and cookware you no longer need.
- Recycle packing paper after unpacking.
Professional Help vs DIY Packing
While DIY packing saves money, hiring professionals ensures safety and efficiency.
- Pros of DIY: Cost savings, full control, flexible timing.
- Cons of DIY: Time-consuming, higher risk of breakage, stress.
- Pros of professional packers: Experience, insurance coverage, speed.
- Cons of professional packers: Higher cost, less control.
For high-value kitchens with fine china, fragile wine collections, or commercial-grade appliances, professional packing is often worth the investment.
How Movers Handle Kitchen Packing
Professional movers use industry-standard techniques:
- Specialized dish boxes with reinforced cardboard
- Foam inserts for glasses and wine bottles
- Climate-controlled trucks for sensitive appliances
- Inventory checklists to keep everything organized
If you live in Los Angeles, companies like SQ Moving provide these services as part of a full relocation package.
Final Checklist Before Moving Day
- Confirm all appliances are unplugged and drained.
- Double-check that boxes are taped securely.
- Label every box by contents and room.
- Separate fragile items for extra care.
- Keep essentials box and cooler with you.
Conclusion
Packing the kitchen properly is a mix of organization, patience, and the right supplies. By decluttering early, categorizing items, using sturdy boxes, and protecting fragile goods, you’ll minimize stress and damage during your move. Whether you decide to handle everything yourself or hire trusted professionals like movers in Los Feliz, taking the right steps will make unpacking in your new home much easier.
Your kitchen is the heart of your home—protect it with care during your move.