

Introduction
When 71% of businesses have a website as of 2023, what are you waiting for? Still not convinced? Check this! The growth rate of the global ecommerce marketplace for 2023 is predicted at 8.9% while bringing worldwide ecommerce sales to $5.9 trillion.
With the rise of ecommerce, the significance of online store websites cannot be overlooked. To contribute to the flourishing online shopping trend worldwide, you have to have an online ecommerce store setup in place.
To assist you throughout your online store journey, we’ve come up with this blog post describing an ultimate, quick step-by-step guide on how to build an online store website in less than 1 hour. It’s not just a quick fix but an interesting method to follow along with us.
An Ultimate Step-by-Step Tutorial On How To Build An Online Store
Creating an e-commerce store from scratch can seem intimidating, but with the appropriate resources and tools, even novices can launch their online shop in under an hour.
Numerous platforms are available for starting your online store, though we recommend WordPress since it’s the best and most user-friendly option. Opting for WordPress as your online store platform yields multiple benefits.
Without any further delay, let’s begin with our steps for building an online store.
Step 1: Define your target audience and products
Conduct market research, create buyer personas, and study your competitors while finding your products or digital products niche to sell within your online store.
You can target a specific industry to choose your product segment before understanding how to build an online ecommerce store. The search process is way easier when it comes to finding digital products. You can sell among product niches like software, ebooks, or online courses.
Note: We’re assuming that you already took a lot of time researching your product niche to sell within an online marketplace. So, we’re not evaluating the time for this step.
Step 2: Purchase your domain name and web hosting
Estimated time: 10 mins
The very first step is to buy a domain name for your online store. A domain isn’t just a URL but it represents your brand and helps you stand out from the competition.
So, make sure you’re putting the needed effort into choosing your domain name and making it relevant to your business. There are many reputed domain registrars available to choose from such as GoDaddy, Hostinger (also a web hosting service provider), Bluehost, etc.
Use web hosting if you already have it in your plan to use for another domain name or buy a new web hosting service if you don’t have it already.
Keep the following factors in mind while buying your web hosting service. This is also immensely helpful in knowing how to start an online business.
- Available storage
- Monthly traffic
- Loading speed
- Data security
- Customer support
- Payment methods
- CMS (WordPress preferable)
- Any extra perks, if provided
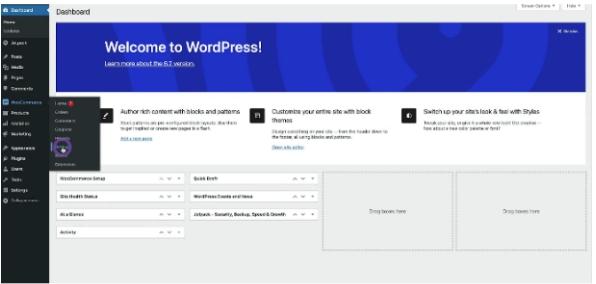
Step 3: Install WordPress Core
Estimated time: 5 mins
You have four methods available to install WordPress among which the web hosting service method that comes with WordPress pre-installed is the easiest way to proceed with.
FYI, we’ve mentioned 4 methods in brief below:
- Installation via web hosting that comes with WordPress pre-installed
- Installation of WordPress via cPanel and auto installers
- WordPress manual installation via FTP
- Installation of WordPress on your own computer
Let’s say you’ve chosen Hostinger as your web hosting provider! So, you need to follow the steps given below to install WordPress Core directly via Hostinger.
Note: There are various other reputed WordPress-specific hosts that offer this facility of WordPress pre-installed.
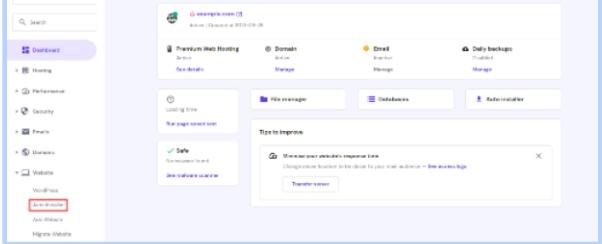
#1 Go to Auto-Installer
After you have purchased your Hostinger web hosting, open its dashboard, and go for the Auto-Installer tab on the left sidebar menu.
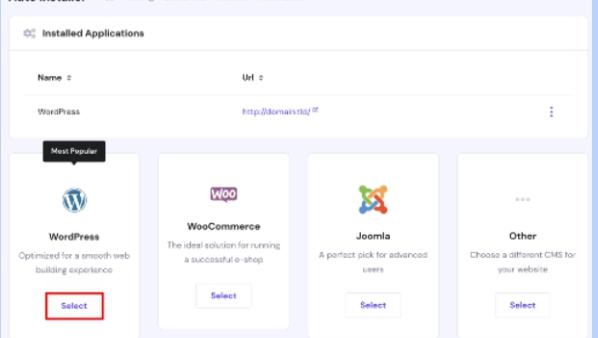
#2 Search WordPress
Search the WordPress Select button as shown below, and tap it.
#3 Enter your necessary information
Now, you need to enter your important details, such as URL, Language, Administrator Username, Administrator Password, Administrator Email, Website Title, and Website Tagline.
#4 Install WordPress
At last, click the Install button, and you’re all done with the WordPress installation.
Step 4: Install the best WordPress theme for your online store
Estimated time: 5 mins
A multi-vendor theme can help you get started in no time if you’re looking forward to building a robust e-commerce marketplace or an online store.
These themes are crafted to facilitate the creation of online stores that can accommodate multiple vendors. They seamlessly integrate with the top eCommerce plugins that are currently available on WordPress, enabling vendors to easily list their products for sale on your website.
Introducing Vendrify, the ultimate multi-vendor WordPress theme that tops the charts for how to build an online store! Whether you’re looking to set up a single vendor store or a multi-vendor marketplace, Vendrify has got you covered.
With Vendrify, you can leverage all the powerful features of WooCommerce, from inventory management to order processing, and take advantage of its extensive library of plugins and extensions.
No matter what niche you’re in, Vendrify is built to cater to vendors of all types. From fashion and electronics to handmade crafts and digital products, Vendrify provides a flexible and customizable platform to showcase and sell your products.
One of the standout features of Vendrify is its live product editing capability. Vendors can make real-time updates to their products directly on the site, ensuring accuracy and efficiency.
We highly recommend using a child theme before you begin setting up your website. Let’s begin after you’re done with setting up!
Find the easiest and ultimate setup guide for Vendrify here.
Note: Please note that our Vendrify WordPress theme is fully compatible with Product Vendors by WooCommerce, which is a WooCommerce add-on for multi-vendor functionality.
Step 5: Install WooCommerce
Estimated time: 4-5 mins
To add the WooCommerce functionality to your website, you can easily obtain the plugin by downloading it for free from the WordPress repository. Once you have the plugin file, you can easily post it directly to your WordPress site.
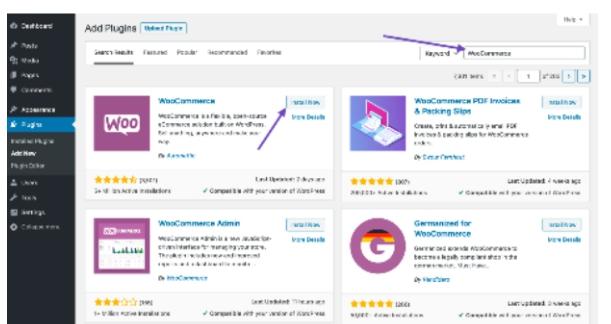
To install WooCommerce, log into your WordPress dashboard, go to Plugins> Add New tab, and then search for WooCommerce as shown below. Click the Install Now button when the plugin appears.
Afterward, you need to tap the Activate button to complete the process. Then, WooCommerce will launch the configuration wizard.
Step 6: Setup WooCommerce
Estimated time: 15-18 mins
After you activate WooCommerce, configure the basic settings for your store. Navigate to the WooCommerce Settings page where you can add your store’s payment and shipping options, tax rates, and other basic settings.
Further steps include adding product types to your store and customizing store design, and layout.
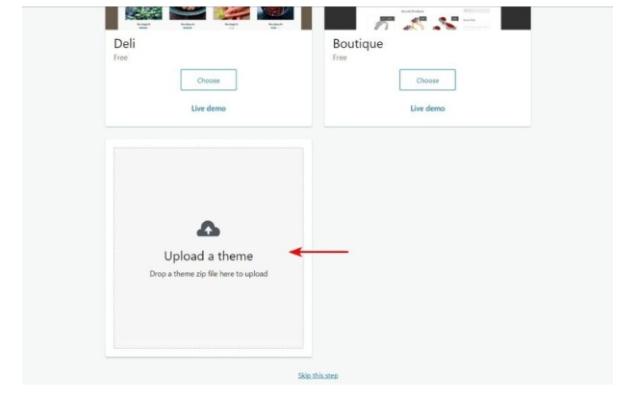
Step 7: Upload a theme
Estimated time: 4-5 mins
While you’re configuring WooCommerce for customization and layout settings, you need to upload your Vendrify theme.
Step 8: Install the required plugins
Estimated time: 10-12 mins
Since a plugin amplifies the functionality of a theme, we recommend installing all the recommended plugins.
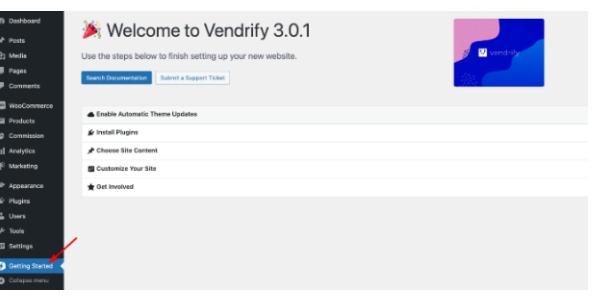
Visit the Getting Started tab, and click “Install Required Plugins” then “Install Plugins”.

So, if you’re looking forward to knowing how to create an online store for free, it’s almost impossible as the cost of domain registration and web hosting still cannot be overlooked. Furthermore, you will have to consider buying a premium WordPress theme for a hassle-free experience.
Hopefully, this guide has nurtured you well enough if you were looking forward to knowing how to make a website to sell products. We’ve tried our best to include each important piece of information regarding the same. Feel free to reach us in case of any queries!
Conclusion
So, we’ve just wrapped up a detailed discussion on how to build an online store in less than an hour. We’ve covered all the essential steps you need to take and estimated the time each step might take on how to make your own ecommerce website.
Now, if you’re looking for a great theme to use for your online store, we highly recommend Vendrify – a multivendor WordPress theme. It’s easy to use, customizable, and designed specifically for creating online marketplaces.
Plus, it’s compatible with WooCommerce, one of the most popular e-commerce plugins for WordPress. So, if you’re ready to get started building your online store, give Vendrify a try!