

Modernizing your home often involves finding the perfect balance between style and function. Currently, DIY cable railing systems are a top choice for both ambitious homeowners and professional contractors. Their minimalist aesthetic, paired with extreme durability, makes them a go-to solution for decks, staircases, and interior lofts.
However, a professional-looking result depends entirely on preparation. Understanding the specific tools and components needed for a successful DIY cable railing installation is the difference between a sleek finish and a frustrating delay.
In this guide, we’ll break down the hardware and specialized equipment required to transform your space. For a deeper look at comprehensive kits, visit the rooftop terrace and DIY railing resource hub.
Why Homeowners Are Choosing Cable Systems
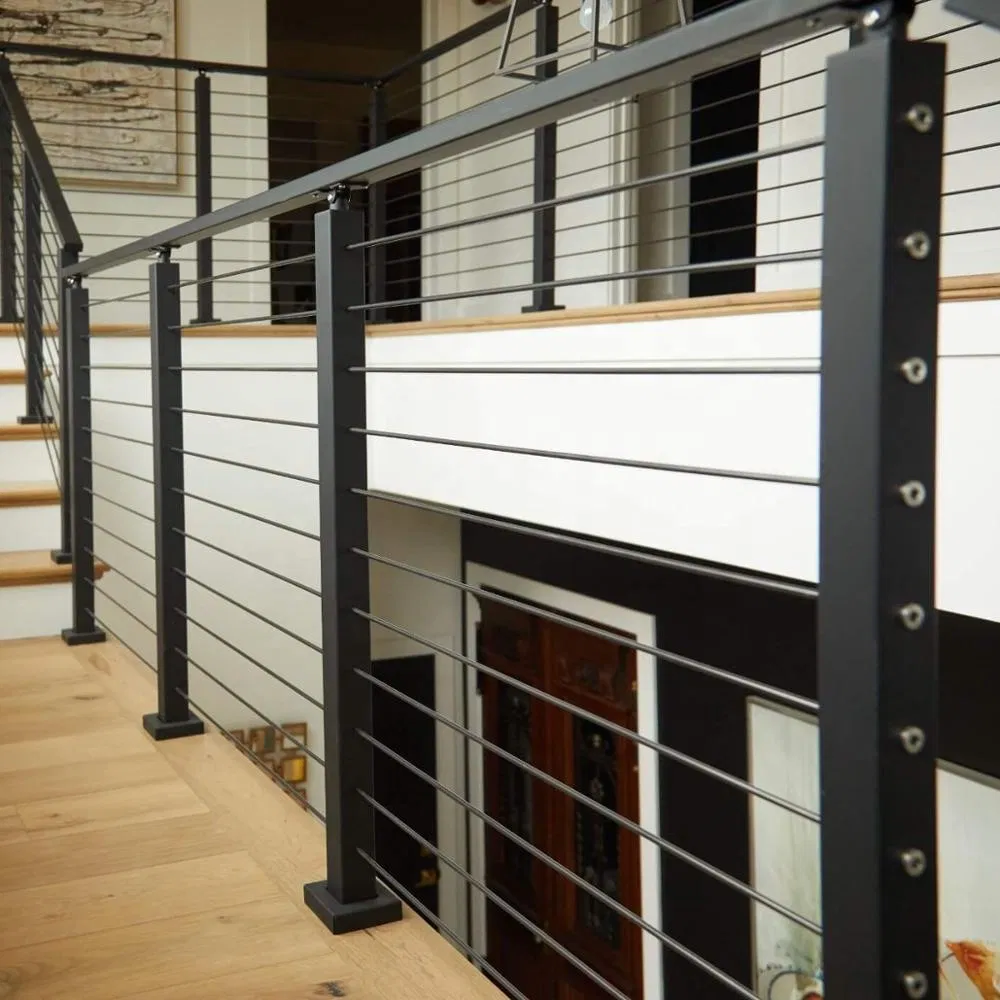
Cable railings offer more than just a “industrial-chic” look; they are engineered for performance. Unlike traditional wood balusters that rot or glass panels that require constant cleaning, cable systems provide:
- Maximized Visibility: Enjoy an uninterrupted view of your landscape.
- Longevity: Marine-grade metals can last 20–30 years.
- Airflow: Perfect for breezy balconies and exterior decks.
If you are just starting your research, we recommend reading our ultimate guide to cable railing DIY kits to find the right style for your home.
The Fundamental Components
A standard DIY cable railing is a tension-based assembly. You will need to source or purchase a kit containing:
- Structural Posts: These act as the anchor points (End, Corner, and Intermediate).
- Stainless Steel Cables: Typically 1/8″ or 3/16″ diameter.
- Tensioning Hardware: Turnbuckles or threaded studs to keep cables taut.
- Top Rail: Provides lateral stability and a handgrip for safety.
To understand the core engineering behind these parts, check out our guide on what is a railing system.
Essential Tool Checklist
Precision is the secret to a high-quality installation. You cannot “wing it” when tensioning metal cables.
1. Measuring & Layout
- Laser Level: Ensures all holes are perfectly horizontal across multiple posts.
- Chalk Line: For marking straight paths on deck flooring.
- Tension Gauge: Crucial for meeting building codes regarding cable deflection.
2. Cutting & Drilling
- High-Torque Power Drill: Use cobalt or carbide-tipped bits if drilling through stainless steel cable deck railing posts.
- Cable Cutters: Do not use standard wire cutters; specialized cable cutters prevent the wire from fraying or “bird-caging.”
3. Specialty Hardware Tools
- Hydraulic Swager/Crimper: This tool “crushes” the fittings onto the cable ends to create a permanent, high-strength bond.
- Wrench Set: For adjusting turnbuckles during the final tensioning phase.
Material Science: Why 316 Stainless Steel?
When selecting your stainless steel cable wire, the grade of metal is vital. For any outdoor project, 316 Stainless Steel is the standard. It contains molybdenum, which protects against the rust and “tea staining” common in humid or coastal environments.
Pro Tip: If you are working on an interior project, ablack stainless steel stair cablesystem can provide a striking, high-contrast look that hides fingerprints and dust better than polished finishes.
DIY vs. Pre-Assembled Kits
| Feature | Custom DIY | Pre-Assembled Kits |
| Cost | Budget-Friendly | Mid-Range |
| Effort | High (Cutting/Swaging) | Low (Plug & Play) |
| Tools Needed | Advanced | Basic |
For those looking to save time, explore our best stainless steel cable deck railing set for pre-configured options.
Avoid These Common DIY Failures
- Over-spacing Posts: Never exceed 4 feet between posts, or the cables will fail the “4-inch sphere” safety test.
- Weak Top Rails: The top rail must be strong enough to resist the inward “pull” of 10+ tensioned cables.
- Ignoring Local Codes: Always check your local railing manufacturer guidelines or building office before installation.
Summary
Building your own DIY cable railing is a rewarding project that adds significant value to your property. By investing in the right swaging tools, 316-grade stainless steel, and following a precise layout, you can achieve a professional architectural look at a fraction of the cost.
For further assistance or to see these systems in action, visit the Unikim Railings YouTube channel or contact our expert team for a custom hardware quote.
FAQs
Q. Is special training needed to install cable railings?
A. No, but a “measure twice, cut once” mindset is essential. Most homeowners find the process straightforward after the first two cables are installed.
Q. How often should I tighten the cables?
A. Typically, cables should be checked 6 months after installation as the house “settles,” and then once every few years.
Q. Can I use wood posts with cable railing?
A. Yes! Wood posts are very common, though you must use protector sleeves to prevent the cable from cutting into the wood.